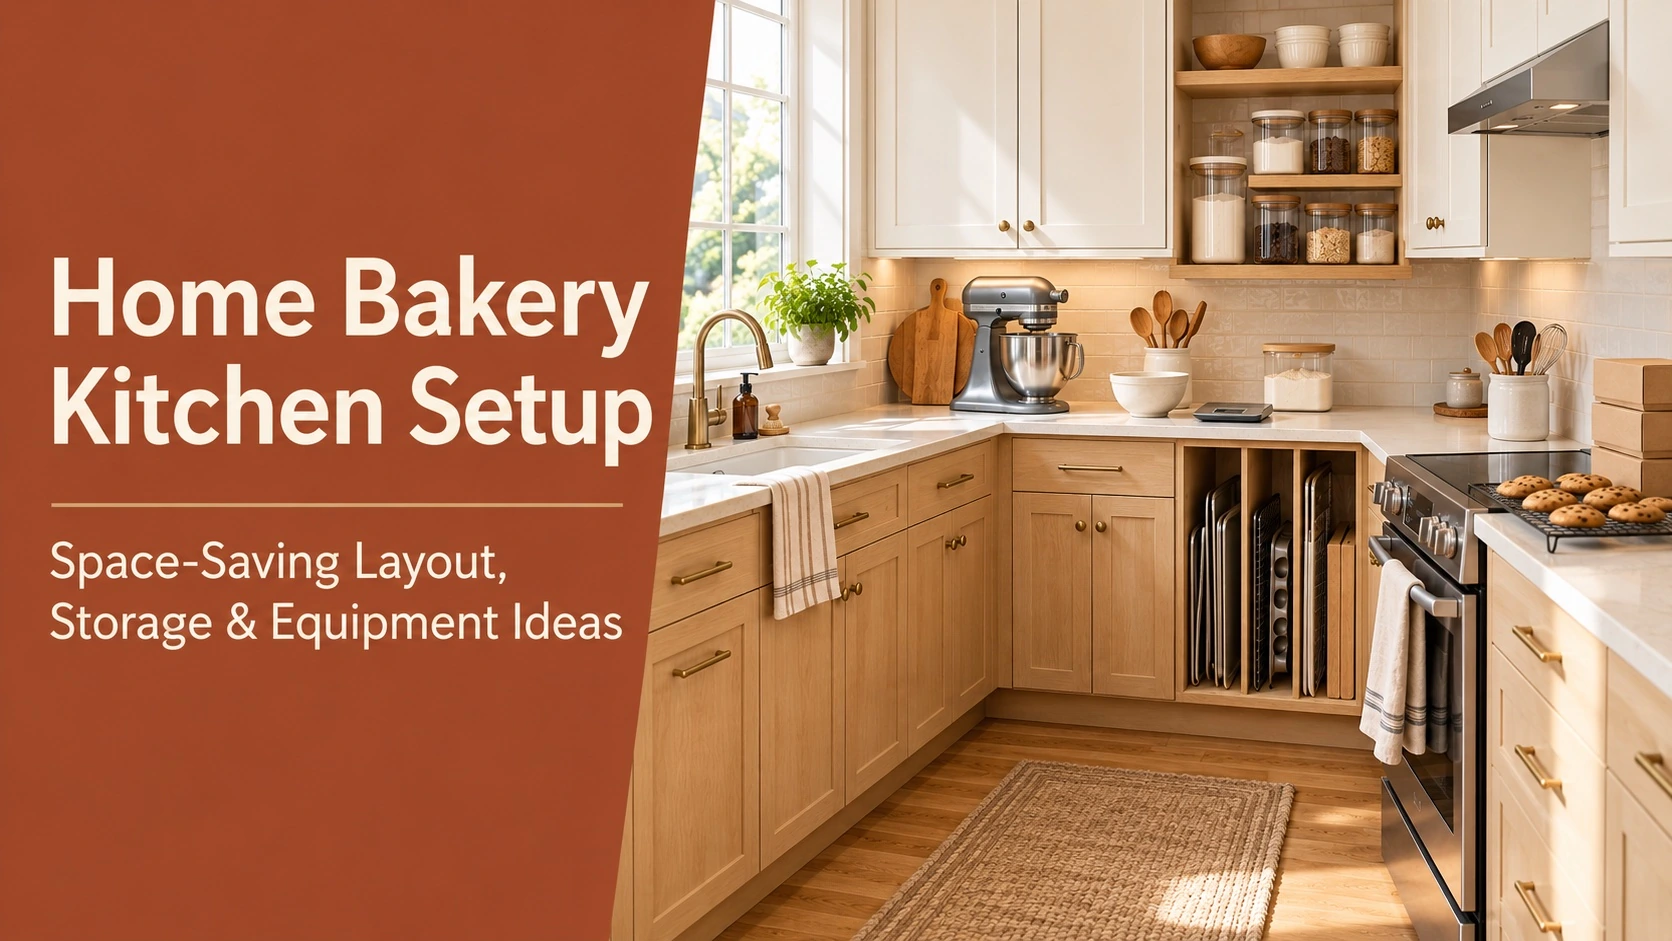
A home bakery kitchen setup works best when you reserve a clear prep surface, keep ingredients and tools near that surface, and make room for cooling and packaging before adding more equipment. In a small kitchen, these tasks can share space at different times, provided you plan the sequence and clean between uses.
Start with the products you actually bake. Cookies need room for trays and cooling racks. Decorated cakes need an uncluttered finishing surface and storage for tall boxes. Bread needs space for mixing, shaping, and proofing. Let that work determine your layout.
Check kitchen requirements before changing the space
If you plan to sell baked goods, confirm your menu is permitted before buying appliances or renovating. Kitchen requirements for a home baking business depend on where you operate and what you make.
For example, California’s cottage food requirements limit production to approved foods and require local registration or permitting. Michigan’s cottage food guidance describes a licensing exemption for qualifying products. Neither should be treated as a nationwide rule.
Ask your state food regulatory agency, and any local authority it directs you to, whether your planned operation needs specific storage, sanitation, equipment, or inspection arrangements. Include your fillings, frostings, and finished-product storage needs in that conversation. Buying a refrigerator does not establish that a refrigerated dessert is permitted for home production.
Choose a layout that keeps the prep counter clear
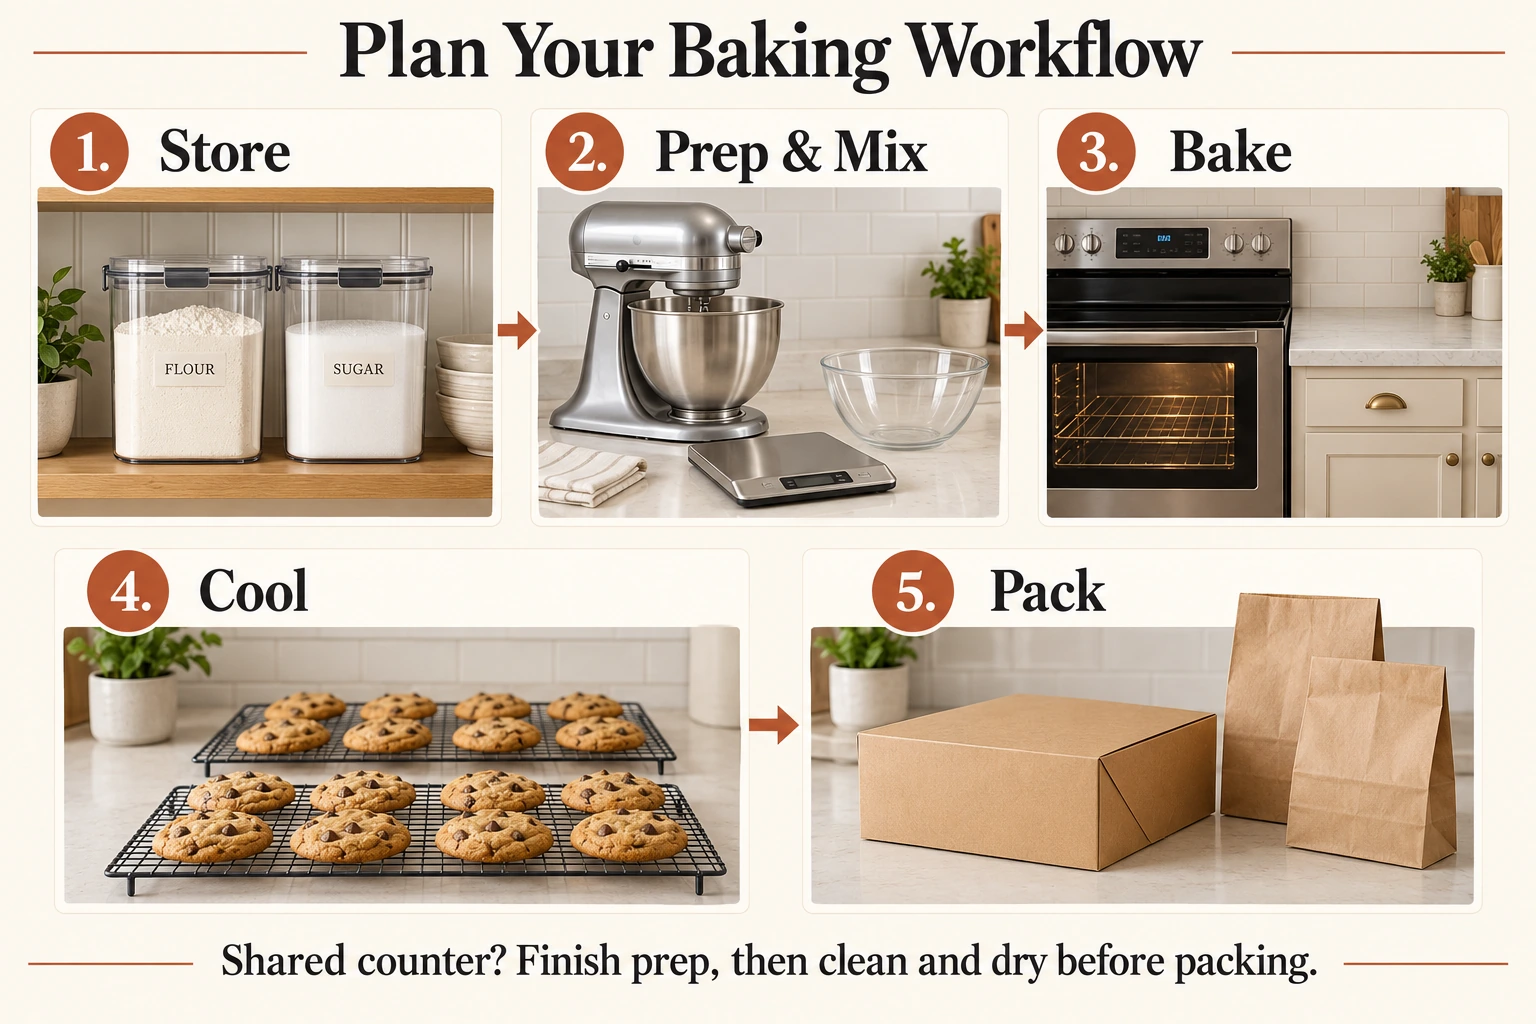
Map the path from ingredient storage to mixing, baking, cooling, and packing. The aim is to avoid carrying hot pans through household traffic or clearing unfinished work whenever another batch comes out.
| Kitchen layout | Practical arrangement | Watch for |
|---|---|---|
| Single-wall | Group measuring and mixing on the longest usable counter; reserve a separate cooling spot. | Appliances spreading across the only work surface. |
| Galley | Keep hot-pan handling on the oven side; use the opposite counter for prep where practical. | Open appliance doors obstructing the aisle. |
| L-shaped | Use one counter run for prep and the other for cooling or finishing. | Supplies disappearing into a hard-to-reach corner. |
Give hot pans a predictable landing place
Reserve a stable landing area near the oven, with protection appropriate for your countertop. Keep it clear throughout the bake. A counter covered with ingredients cannot also serve as a dependable place to put a hot tray.
Position cooling racks outside the sink’s splash area and away from the main walkway. If you use a tiered rack, check its load rating, tray compatibility, and stability before loading it.
Use movable workspace only when it fits
A cart with locking casters can hold tools or provide an extra work surface, but measure its working and parked positions first. Open the oven, dishwasher, refrigerator, and nearby drawers to check that it does not obstruct them.
For a broader look at working within a limited footprint, explore these small kitchen remodel strategies.
Store supplies around the tasks they support
Organize the kitchen so you can retrieve one item without moving several others. Before buying organizers, measure cabinet openings, shelf depth, and the actual equipment you need to store.
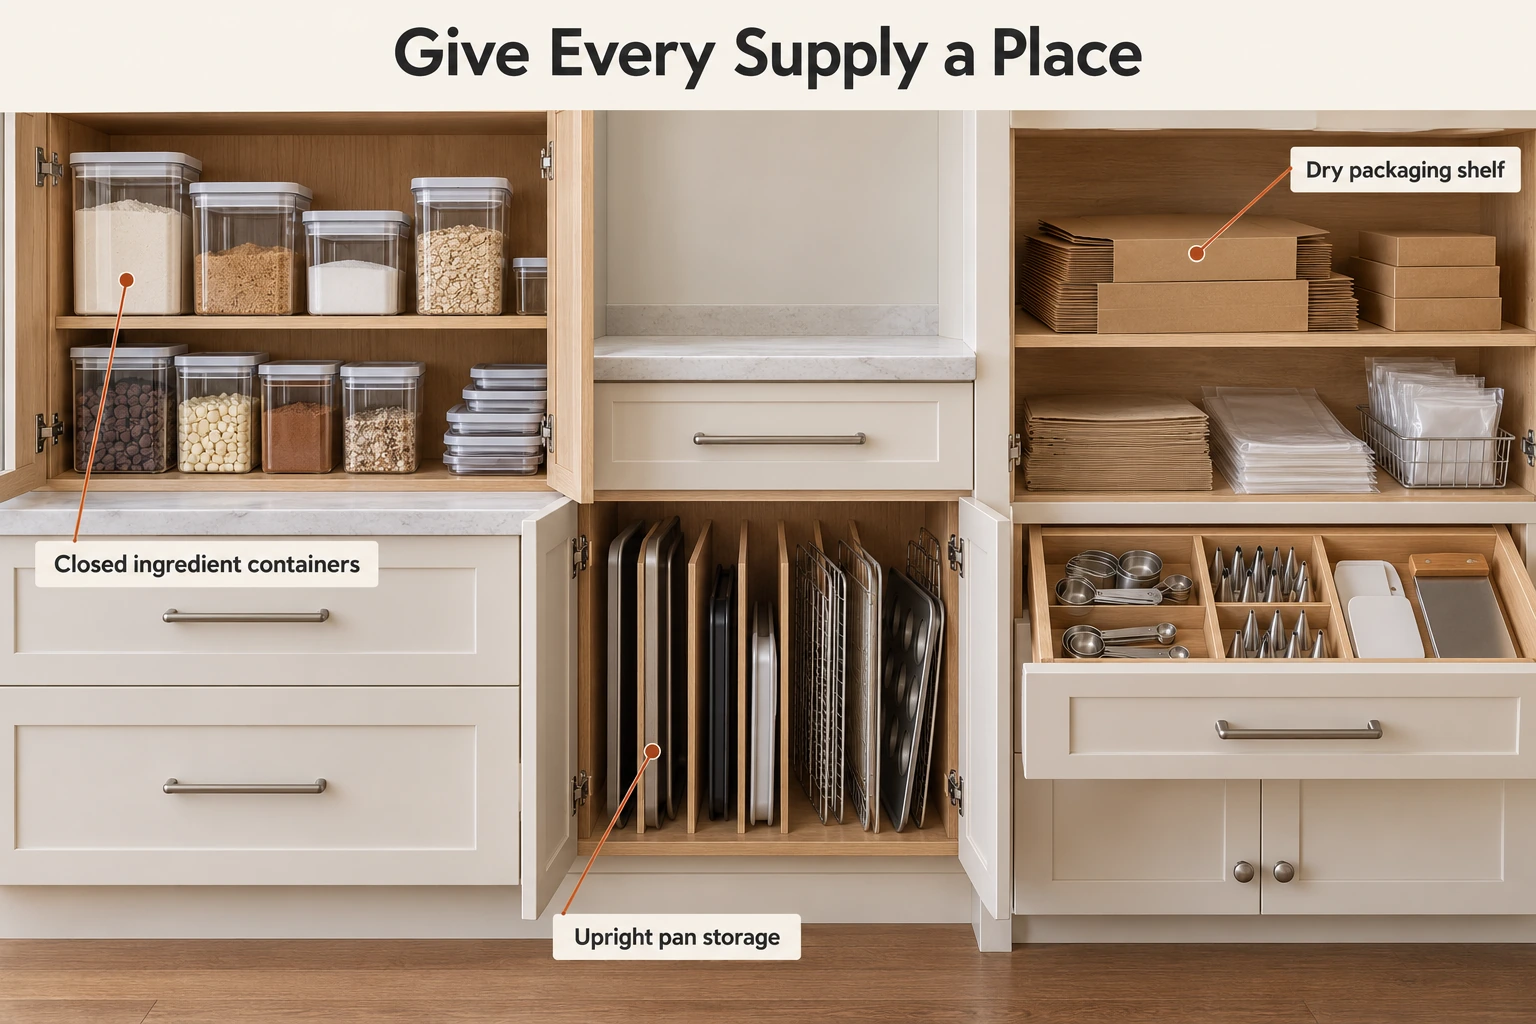
Keep ingredients near the measuring area
Use food-contact-safe containers suited to each ingredient’s storage instructions. Choose sizes you can lift comfortably and that fit your shelves with their lids attached.
Label containers clearly, retain original ingredient and allergen information, and keep older stock accessible so it gets used first. Separate bakery supplies from cleaning products. A dedicated bakery shelf makes stock easier to track, but it does not replace cleaning or allergen controls.
Store pans upright and small tools in shallow compartments
Fit a lower cabinet with dividers for sheet pans, cooling racks, and cutting boards. Leave enough room to remove each piece without scraping past its neighbors.
Nest compatible bowls and keep frequently used tools near the prep surface. Store piping tips, cutters, and mixer attachments in separate compartments rather than one deep bin. Keep heavy equipment at a height where you can handle it comfortably.
Give packaging its own dry storage
Keep flat boxes, bags, and labels in a clean cabinet away from splashes and food preparation. Assemble only the packaging needed for the current order instead of filling the kitchen with empty boxes.
In a shared kitchen, the prep counter can become a packing station after food preparation has finished and the surface has been cleaned and dried. Plan household meals around that handover.
Buy equipment that fits both your menu and your kitchen
Begin with a tool inventory. Keep equipment that already does the job, then fill specific gaps.
| Equipment | What to check before buying |
|---|---|
| Digital scale | Capacity for your bowl plus ingredients, and a display you can see with the bowl in place. |
| Mixer | Suitability for your dough or batter, manufacturer-stated batch limits, and clearance to operate and remove the bowl. |
| Baking pans | Fit inside your oven with the clearance specified in its manual. |
| Cooling racks | Space for the batches that will cool at the same time, plus a practical storage location. |
| Measuring and prep tools | Tools required by your recipes, with a drawer or container assigned to them. |
| Ingredient containers | Food-contact suitability, shelf fit, and a manageable filled weight. |
When filling gaps in your equipment list, browse Amechef’s baking supplies for a home bakery setup and check individual dimensions against your oven, counters, and storage before ordering.
A second appliance should solve a problem you have observed. If baked goods already occupy every cooling surface, extra oven capacity will not resolve that space shortage.
Make targeted upgrades before planning a full remodel
Try cabinet dividers, a dedicated ingredient shelf, and a better packing routine before moving plumbing or replacing cabinets.
If you still need changes, define the problem precisely. You might need a longer uninterrupted prep surface, drawer storage for heavy bowls, or task lighting that illuminates the worktop without your body casting a shadow over it.
For additional appliances, check installation instructions and have a qualified electrician assess the proposed electrical load. Avoid designing the station around extension cords or guessing that an existing circuit can support another appliance.
When the work involves permanent changes, use this guide on how to plan a kitchen remodel to organize the project before selecting finishes.
Test the setup with a complete batch
Run a typical order through the entire process before buying more storage or equipment. Include weighing, mixing, baking, cooling, finishing, packing, and cleanup.
During the test, note:
- Where you set down each hot pan.
- Whether cooling batches leave enough room to prepare the next one.
- Which tools require repeated trips across the kitchen.
- Whether finished orders have a clean holding space.
- Whether household use interrupts production or packing.
Fix the first point where work stalls, then repeat the batch. Your most useful upgrade may be a tray divider or a cleared counter rather than a larger mixer. Let the actual baking process determine what earns space in your kitchen.